This page allows you to view existing examinees, editing them, and adding new examinees.
.png)
Add Examinees
|
To add an examinee: 1.Click 2.You can choose the available group of examinees to choose and you can see the date on which it expires. 3.A dialog box appears with two tabs. •Multiple Examinees: 1.Enter the number of examinees you want to add. 2.Select a category from the drop down menu labeled "Assign To." 3.Select a group from the list showing the groups within the selected category. 4.Click
•Single Examinee 1.Enter the examinee information (full name, e-mail address, and mobile number). 2.Select a category from the drop down menu labeled "Assign To." 3.Select a group from the list showing the groups within the selected category. 4.Click
|
|
.png)
.png)
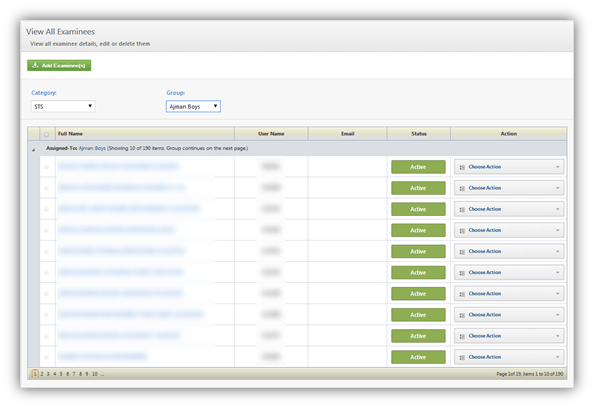
View Examinees
|
View examinees associate to a certain group in a category: 1.Choose a category from the drop down menu labeled "Category." 2.Choose a group from the drop down menu labeled "Group." 3.Examinees appear in a table showing their names, usernames, e-mail addresses, and status.
|
|
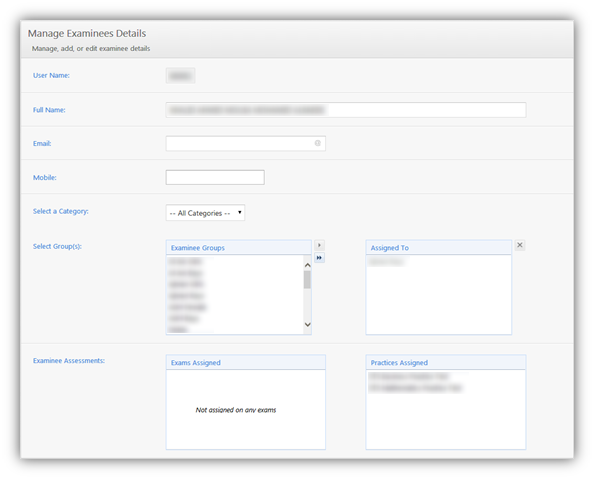
Manage Examinee Details
|
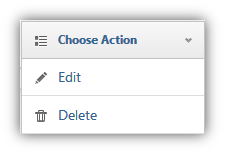
Manage the details of an examinee as follows: 1.Click on the menu labeled "Choose Action" in the table. 2.Click on "Edit." 3.You are directed to Manage Examinee Details 4.Edit the examinee information (name, e-mail address, and mobile number). 5.Assign the examinee to a new group. 1. Choose the category from the drop down menu labeled "Select a Category." 2.Choose group(s) from the list labeled "Examinee Groups." 3.Click 4.View the groups the examinee is assigned to in the list labeled "Assigned To." 6.View the assessments the examinee is assigned to. 7.Click
8.Activate an examinee. 1.Click on the drop down menu labeled "Choose Action" in the table. 2.Click "Activate." 3.Status changes from Activate multiple examinees. 1.Select the examinees by clicking 2.A new button 3.Status changes from 9.Print credentials of an examinee. 1.Click on the drop down menu labeled "Choose Action" in the table. 2.Click "Print Credentials." Print credentials of multiple examinees. 1.Select the examinees by clicking 2.A new button 10.Delete an examinee. 1.Click on the drop down menu labeled "Choose Action" in the table. 2.Click "Delete." Delete multiple examinees. 1.Select the examinees by clicking 2.A new button |
|
Conditions
•You can only delete examinees that are not assigned to an assessment.
See Also
SwiftAssess © 2021